


TL;DR:
- Proper repair of vintage metal shirts involves stabilizing fabric with larger patches and avoiding steam during heat treatments. Essential techniques include using fusible interfacing for small holes, stitching for high-stress areas, and careful rust removal with household acids to preserve metal components. Visible or decorative repairs can enhance the shirt’s history and value, supported by professional restoration when necessary.
You pull out a vintage Slayer tour shirt from 1991, and there it is — a small hole near the hem, print cracking across the chest, and a rusted eyelet catching on everything. Knowing how to repair worn metal shirts is the difference between losing a piece of history and keeping it wearable for another thirty years. Vintage band tees are not just clothing. They are artefacts. And with the right tools and techniques, most damage is absolutely fixable without ruining what makes the shirt irreplaceable.
Table of Contents
- What you need to repair worn metal shirts
- How to repair holes and tears in your metal shirt fabric
- Restoring cracked and peeling prints on metal shirts
- Safely removing rust from metal parts on your metal shirts
- Why traditional repair methods don’t always work for vintage metal shirts (and what actually does)
- Find rare vintage metal shirts and support your repair projects
- Frequently asked questions
Key Takeaways
| Point | Details |
|---|---|
| Prepare with right tools | Having fusible interfacing, parchment paper, and fabric-safe rust removers ready is essential for effective repairs. |
| Patch fabric holes properly | Large or stressed holes require backing patches at least 2cm larger and stitching for durability. |
| Restore prints with care | Use dry irons with parchment paper for screen print reflow; avoid steam to prevent damage. |
| Treat rust gently | Remove rust from metal parts using natural acids applied cautiously to protect fabric. |
| Know when to seek pros | Severe burns or extensive damage may need professional restoration to avoid further harm. |
What you need to repair worn metal shirts
Before you touch a single thread, getting your materials together is everything. Rushing in with the wrong iron temperature or a mismatched patch fabric is how collectors end up making things worse. Good preparation is most of the work.
Here is what you need in your repair kit:
- Fusible interfacing (thin weight for small holes, medium weight for patches)
- Household iron set to cotton, zero steam
- Parchment paper as a protective barrier between iron and print
- Cotton fabric scraps in a similar weight and weave to the original shirt
- Fabric glue for temporary holds before stitching
- Iron-on patches for medium to large holes
- Fabric markers or textile acrylic paint for print touch-ups
- Lint roller to clear debris before any heat application
- Mild rust remover or natural acids like lemon juice and white vinegar
- Small brush for applying rust solutions precisely
Small holes in T-shirts can be repaired using thin fusible interfacing and a household iron with no sewing required. That is genuinely good news for anyone who does not own a sewing machine or does not feel confident with a needle. For print damage, heat transfer peeling can be reversed with a finishing press through parchment for 5 to 8 seconds. And for rusted metal components like eyelets, zippers, or studs, safe rust removal uses mild solutions like lemon juice and salt applied carefully so the surrounding fabric stays undamaged.
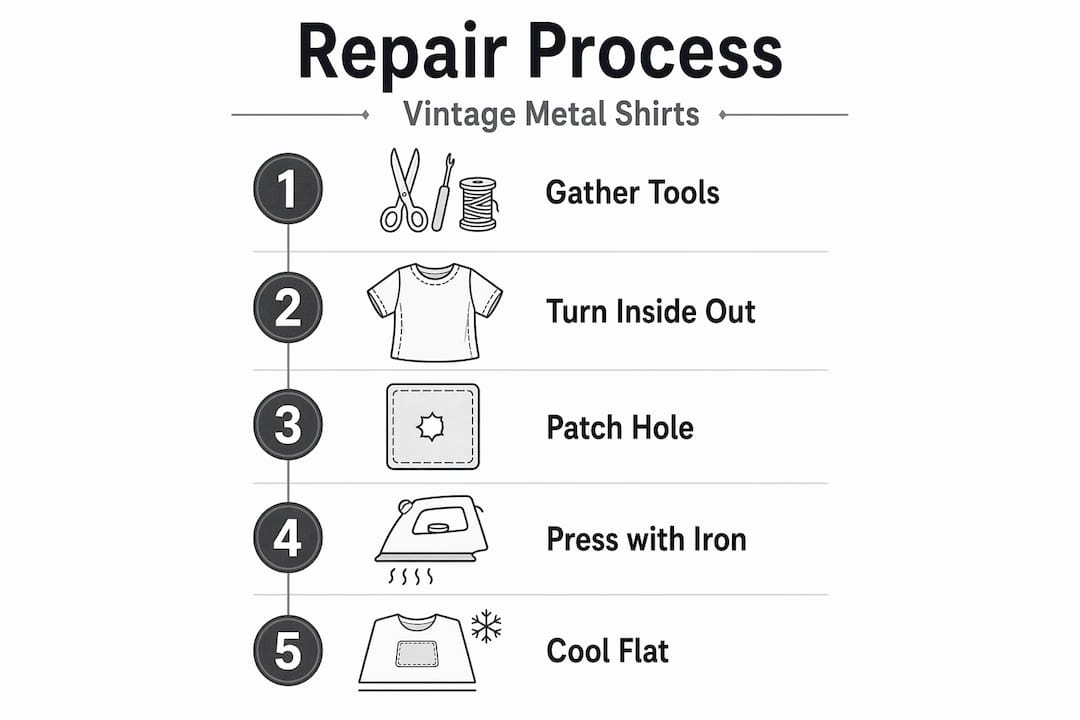
Preparation steps before any repair:
| Step | Action | Why it matters |
|---|---|---|
| Turn shirt inside out | Expose the back of the damaged area | Protects visible print during heat work |
| Clean the area | Remove loose threads, lint, dust | Ensures adhesion and clean bonding |
| Test materials | Trial iron temperature on a hidden seam | Prevents scorching or print lift |
| Assess fabric condition | Check for thinning around the damage | Weak fabric needs a larger stabilising patch |
For further guidance before you start, the restore vintage metal tees resource covers print-specific prep in detail. And if you want a broader overview of caring for metal shirts through washing and storage as well, the band shirt care guide is worth reading alongside this.
With your tools and materials ready, the next step is understanding how to repair fabric holes and tears on your metal shirts.
How to repair holes and tears in your metal shirt fabric
The method you use depends almost entirely on the size of the hole and where it sits on the shirt. A pinhole near the hem behaves very differently to a 3cm tear under the arm.
For small holes (under 1cm):
- Lay the shirt flat on an ironing board, hole facing up.
- Cut a piece of thin fusible interfacing slightly larger than the hole.
- Slide the interfacing beneath the hole, rough side facing the fabric.
- Place a thin cotton pad or pressing cloth on top.
- Press firmly with a dry iron on cotton setting for 10 seconds. No steam.
- Allow to cool completely before turning right side out.
For medium to large holes (1cm and above):
- Cut a cotton patch at least 2cm larger than the hole on all sides.
- Position it behind the hole and pin in place.
- Apply fabric glue around the hole edge to hold the patch temporarily.
- Once dry, stitch around the perimeter with strong thread, either by hand or machine.
- Trim any loose threads and press lightly through a pressing cloth.
Pro Tip: For holes in high-stress areas like underarms or side seams, skip the iron-on method entirely. Fusible interfacing alone will not survive repeated washing and movement in those spots. Stitching is the only method that holds long-term. A double row of stitching in a matching thread colour is nearly invisible on dark shirts.
The band shirt repair guide goes deeper on thread selection and stitch types if you want to match the original construction. For more on preserving collector value during repairs, the collector’s repair tips page covers what to prioritise when you are working on a genuinely rare piece.
| Repair method | Best for | Durability | Skill level |
|---|---|---|---|
| Fusible interfacing only | Small holes, low-stress areas | Moderate | Beginner |
| Iron-on patch | Medium holes, flat areas | Moderate to good | Beginner |
| Stitched patch | All sizes, high-stress areas | Excellent | Intermediate |
| Fabric glue plus stitching | Large tears, fraying edges | Excellent | Intermediate |
After mastering fabric repair, let’s explore restoring and preserving those iconic band print designs on your shirts.
Restoring cracked and peeling prints on metal shirts
Cracked Plastisol prints are the most common form of visible ageing on vintage metal shirts. The good news is that Plastisol ink does not fully degrade. It just loses its bond to the fabric. Heat reflow can bring it back.
Step-by-step print restoration:
- Lay the shirt flat on an ironing board, print side up.
- Remove all moisture from the garment. Any dampness will ruin this process.
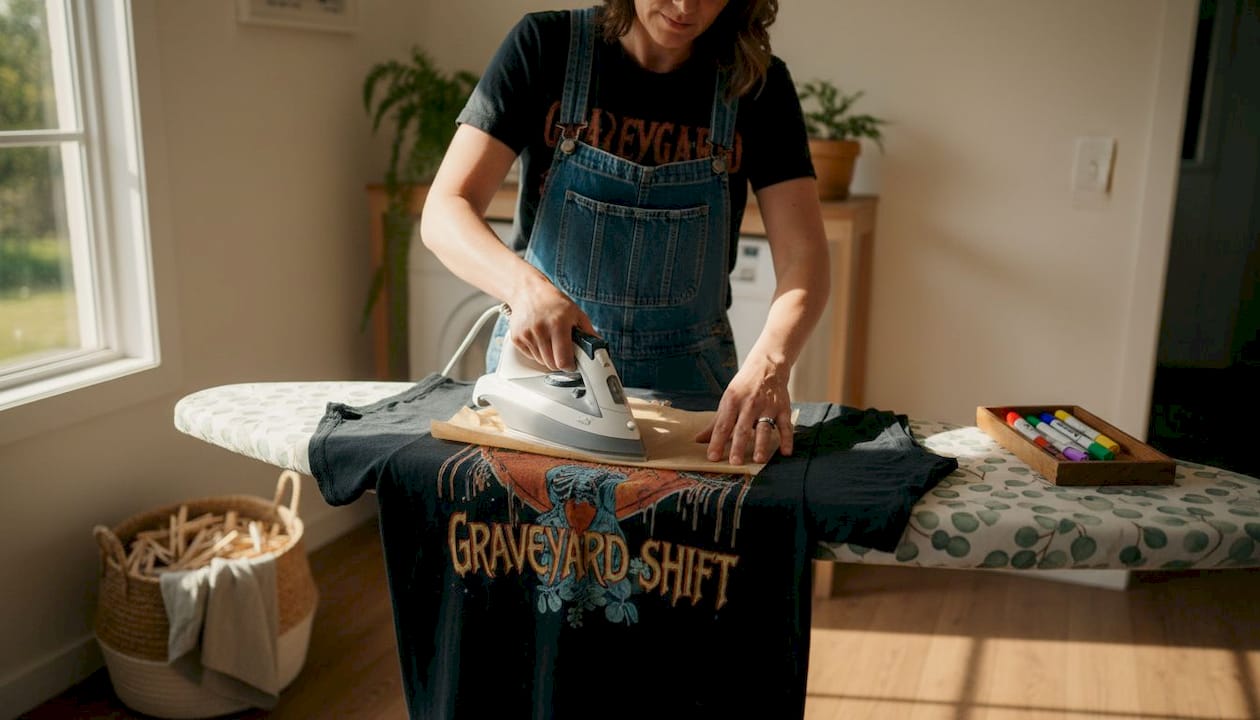
- Place parchment paper over the entire print area.
- Set your iron to cotton, zero steam, medium-high heat.
- Press the iron firmly and evenly over the parchment for 10 to 15 seconds.
- Lift the iron straight up without dragging.
- Allow the print to cool completely before moving the shirt. Do not touch it while it is still warm.
“Using parchment paper as a protective barrier is the professional standard to fix cracked Plastisol prints by heat reflowing with a steam-off, medium-high iron.”
That cooling step is where most people make a mistake. If you shift the shirt while the ink is still pliable, you lift it rather than re-bond it. Give it a full two minutes before checking.
For peeling heat-transfer prints, the approach is slightly different. After removing any loose carrier film, finishing presses using medium pressure through parchment for 5 to 8 seconds stop edge lifting and re-adhere the transfer. Short, firm presses work better than long ones here.
Pro Tip: If the print has areas of genuine pigment loss rather than just cracking, fabric markers in black, white, or red can fill gaps convincingly on classic metal shirt designs. Test your colour match on a hidden area before touching the print.
For shirts from the 90s with heavily degraded artwork, the print restoration guide covers period-specific print types and how to approach each one. Caring for your shirts before damage sets in is also addressed in the band shirt print care resource.
Beyond fabric and print, many metal shirts feature metal parts that can rust. Next, learn how to treat those without damaging your tee.
Safely removing rust from metal parts on your metal shirts
Rusted eyelets, zippers, studs, and buttons are common on vintage shirts that have been stored in humid conditions or washed without fully drying. The damage looks worse than it usually is, and most rust responds well to mild treatment.
Rust removal process:
- Identify the fabric type and assess whether the metal part can be detached.
- If detachable, remove it and treat separately.
- For fixed metal parts, protect surrounding fabric with masking tape or a folded cloth.
- Apply your chosen rust solution directly onto the metal only, using a small brush.
- Allow to sit for 5 to 10 minutes depending on severity.
- Scrub lightly with a soft toothbrush. No wire brushes or abrasive pads.
- Rinse the treated area thoroughly with cool water.
- Repeat if staining persists, but do not apply heat until rust is fully removed.
- Air dry the garment away from direct sunlight.
Rust removal options compared:
| Method | Effectiveness | Fabric safety | Availability |
|---|---|---|---|
| Lemon juice and salt | Good for light rust | High | Household |
| White vinegar soak | Good for moderate rust | High | Household |
| Commercial rust remover | Excellent for heavy rust | Medium (test first) | Hardware store |
| Baking soda paste | Mild, surface rust only | Very high | Household |
Rust can be removed safely using lemon juice and salt or a white vinegar soak, provided the solution is applied carefully to metal rather than spread across the surrounding fabric. Avoid bleach entirely. It does not remove rust. It oxidises the iron further and can destroy fabric fibres in the process.
Pro Tip: After rust removal, apply a thin coat of clear nail varnish to cleaned metal eyelets or studs to prevent re-rusting during future storage. It is invisible and lasts through multiple washes.
The band shirt rust treatment section has additional guidance on storage practices that prevent rust from forming in the first place.
With rust treated, ensuring your repairs last means following best practices. Here is what most guides miss entirely.
Why traditional repair methods don’t always work for vintage metal shirts (and what actually does)
Here is something most repair guides will not tell you: the visible damage is rarely the whole problem. A small hole in a 1988 Maiden shirt usually sits in fabric that has been weakening for years around it. If you patch only the hole itself, the fabric tears again centimetres away within months. The actual repair is stabilising a much larger zone than the visible damage suggests. That is why adequately sized patches, ones that extend well beyond the damaged area, outperform neat, minimal patches every single time.
The steam issue with print repair is non-negotiable, and yet it is the most common mistake. Skipping moisture control leads directly to failed print repairs and bubble formation beneath the ink. People reach for their steam iron because it is what they use for everything else, and they destroy the print in the process. Zero steam. Every time. No exceptions.
On scorch marks from accidental ironing, repeated home attempts to fix scorched fabric often cause irreparable damage. If two or three careful attempts have not improved the mark, stop. Continuing generates more heat stress on already weakened fibres. A professional textile restorer is the correct next move for anything with genuine collector value.
There is also something worth saying about visible mending. The repair community has largely moved toward embracing contrast stitching, darning patterns, and decorative patches as intentional aesthetics rather than things to hide. On a vintage metal shirt, bold visible repairs can read as part of the garment’s history rather than evidence of damage. If you cannot make a repair invisible, make it interesting. It aligns with the ethos of the culture anyway.
The expert print repair guide goes further on print-specific restoration decisions, including when to attempt a repair yourself and when the shirt’s value warrants professional hands.
Find rare vintage metal shirts and support your repair projects
If repairing your collection has you thinking about what you want to add next, we have you covered.

At Vintage Metal Store, we stock genuine ex-tour stock, deadstock, and second-hand shirts from the heaviest bands across the 80s, 90s, and early 2000s. From rare Metallica 1992 tour shirts to a deep catalogue of vintage Metallica shirts sourced directly from tours, every piece is the real thing. We also publish repair and care resources across our blog to help collectors keep their shirts in collector-grade condition. Whether you are tracking down a replacement for something beyond saving or adding another piece to a serious collection, we source with the same care you put into your repairs.
Frequently asked questions
Can I repair burnt marks on my metal shirts at home?
Minor iron scorch marks may respond to light treatment at home, but severe burns with dark or brittle fabric typically cannot be repaired and require professional restoration or replacement.
Is ironing with steam recommended during print restoration?
No. Steam causes bubbling and delamination of Plastisol prints during restoration. Always use a dry iron with parchment paper as a barrier.
What is the best method to fix small holes on metal shirts without sewing?
Thin fusible interfacing ironed onto the back of a small hole provides a solid no-sew fix for low-stress areas like the body and hem of a metal shirt.
How can I remove rust from metal parts on my shirts without damaging fabric?
Apply lemon juice and salt or white vinegar directly to metal parts only, avoid abrasive tools, rinse thoroughly, and air dry away from heat and sunlight.
Recommended
- How to restore heavy metal tee prints: Expert care – Vintage Metal Store
- Collectible heavy metal shirts: Rare picks, values, tips – Vintage Metal Store
- Collector’s guide to vintage heavy metal t-shirts: spot, value, collec – Vintage Metal Store
- Identifying Dead Stock Heavy Metal Shirts Step-by-Step – Vintage Metal Store


