


TL;DR:
- Properly displaying collector shirts requires controlling light exposure, using archival materials, and employing secure mounting methods to prevent damage. Rotating shirts every 3 to 6 months and avoiding direct sunlight significantly extend fabric lifespan while ensuring aesthetic presentation through creative, story-driven arrangements. Serious preservation involves using conservation-grade framing systems with UV-filtering glass and acid-free supports, treating each display decision with care to protect irreplaceable textiles.
You’ve spent years tracking down the shirts that matter. A Metallica 1992 tour tee pulled from dead stock. A battered Slayer bootleg from some sweaty 1988 support slot. Knowing how to display collector shirts properly is the difference between owning a living collection and watching irreplaceable fabric slowly degrade on a wall. This guide covers everything from materials and mounting methods to lighting, creative arrangement, and the common mistakes that turn a prized piece into a faded rag.
Table of Contents
- Key takeaways
- How to display collector shirts: essential materials
- Step-by-step guide to safe and stylish display
- Common mistakes that damage collector shirts
- Creative display ideas that preserve and impress
- What I have learned after years of displaying vintage shirts
- Get the shirts worth displaying
- FAQ
Key takeaways
| Point | Details |
|---|---|
| Control light exposure | Keep display areas under 50 lux and rotate shirts every 3 to 6 months to limit cumulative damage. |
| Use archival materials | Acid-free backing, UV-filtering glass, and padded supports protect fabric from chemical and physical harm. |
| Mount without pinning | Velcro hanging slats and rigid boards distribute weight evenly and prevent tear points in the fabric. |
| Avoid direct sunlight | Choose interior walls away from windows and damp areas to reduce fading and mildew risk. |
| Rotate for longevity | Cycling shirts in and out of display extends their lifespan significantly over leaving them permanently lit. |
How to display collector shirts: essential materials
Getting the right materials sorted before you hang a single shirt saves you from making expensive mistakes later. This is not the stage to cut corners.
| Material | Purpose | Recommended spec |
|---|---|---|
| UV-filtering glazing | Blocks UV rays from reaching fabric | Museum or conservation glass (99% UV block) |
| Acid-free backing board | Prevents chemical off-gassing onto fabric | Archival foam board or conservation board |
| Velcro hanging strips | Distributes weight along top edge | Sew-on Velcro, 50mm wide minimum |
| Padded hangers | Supports garment weight evenly | Wooden or plastic with cotton padding |
| Shadow box frame | Protects and displays three-dimensionally | Deep rebate, sealed, UV-glazed |
| Measuring tape and level | Accurate, straight installation | Standard hardware store tools |
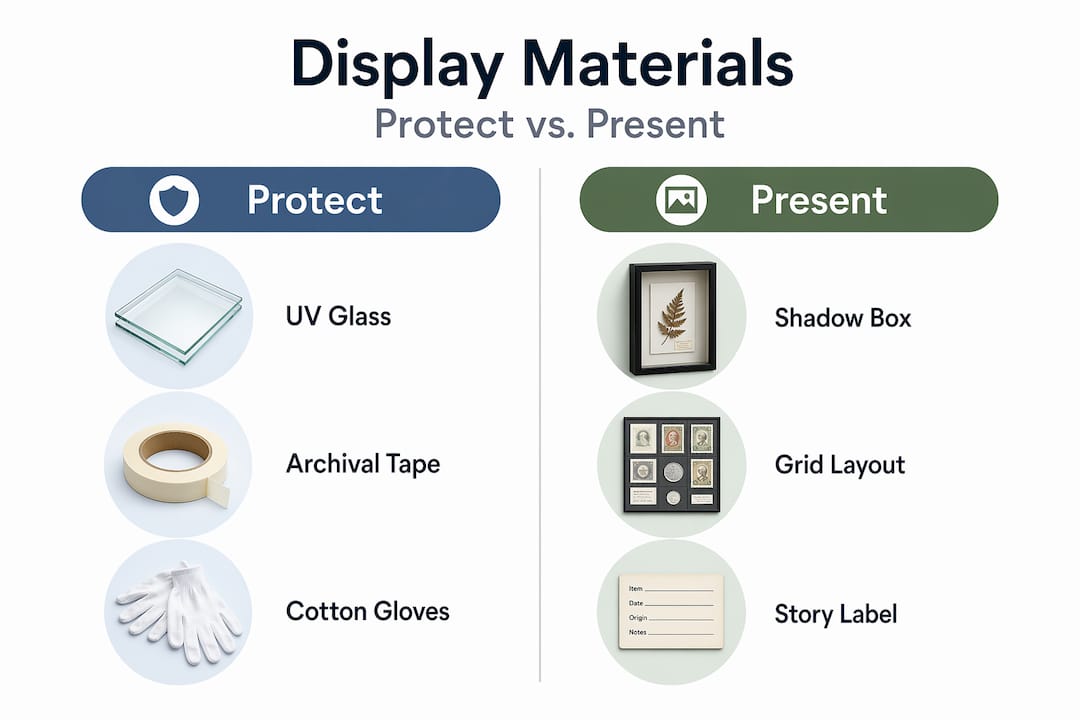
The framing system matters as a whole unit, not just its individual parts. Non-archival adhesives can off-gas chemicals into the fabric even when UV glass is protecting it from light. You need acid-free backing, acid-free mounting materials, and no adhesive making direct contact with the shirt itself. Think of the frame as a sealed microclimate.
For mounting without a frame, the principle is the same. Mounting large textiles safely requires distributing weight evenly along the top edge using Velcro slats or hanging rails rather than pinning through the fabric. A sewn or pinned-on Velcro strip at the top spreads the load across the full width of the shirt.
Pro Tip: Buy conservation-grade materials even if the shirt feels indestructible. A 1989 Sepultura shirt in perfect condition is worth far more than one with creased fabric from a cheap backing board.
Light control accessories are the other half of the equation. UV window film, blackout curtains, and dimmable LED fittings all help you manage how much light hits the display. Get a cheap lux metre app on your phone and measure the actual light levels where you plan to hang shirts. You will likely be surprised by how bright a “dim” corner actually is.
Step-by-step guide to safe and stylish display
Location is the first decision, and it shapes every choice after it. You want an interior wall away from windows, away from bathrooms or kitchens, and away from any source of direct sunlight. Direct sunlight and damp areas are the two fastest ways to fade fabric and introduce mildew. A hallway, study, or bedroom wall is almost always a better choice than a living room facing a north-facing window.
Once you have your location, follow this process:
- Measure and plan your layout. Sketch the wall dimensions and mark where each shirt will sit. Leave at least 10cm between frames or mounted shirts to avoid overcrowding and allow air circulation.
- Prepare each shirt. Spot-clean any marks with a soft cloth and mild textile cleaner. Let shirts dry completely before mounting. Lay each shirt flat and smooth out any creases before it goes into a frame or onto a support board.
- Choose your mounting method. For premium pieces, opt for professional shadow box framing with UV glass and acid-free backing. For a more casual rail display, attach a Velcro strip along the inside of the collar band and hang from a mounted wooden slat.
- Use padded supports where needed. Proper padded hangers distribute garment weight evenly and prevent shoulder distortion over time. For framed shirts, a lightly padded acid-free board behind the fabric achieves the same effect.
- Install your hanging hardware. Use a level and measuring tape to mark hook positions before drilling. Poorly aligned mounts cause uneven weight distribution, which stresses fabric at contact points.
- Handle shirts carefully during installation. Slow or uncoordinated handling causes abrasion damage during mounting. Work with a second person for larger pieces and support the full weight of the shirt at all times.
- Set your lighting. Position LED strip lights or spotlights so they illuminate indirectly, not directly onto the fabric surface. Aim for under 50 lux at the shirt face.
- Plan your rotation schedule. Mark the install date on the back of each frame. Rotating exhibits every 3 to 6 months limits cumulative light exposure and significantly extends fabric lifespan.
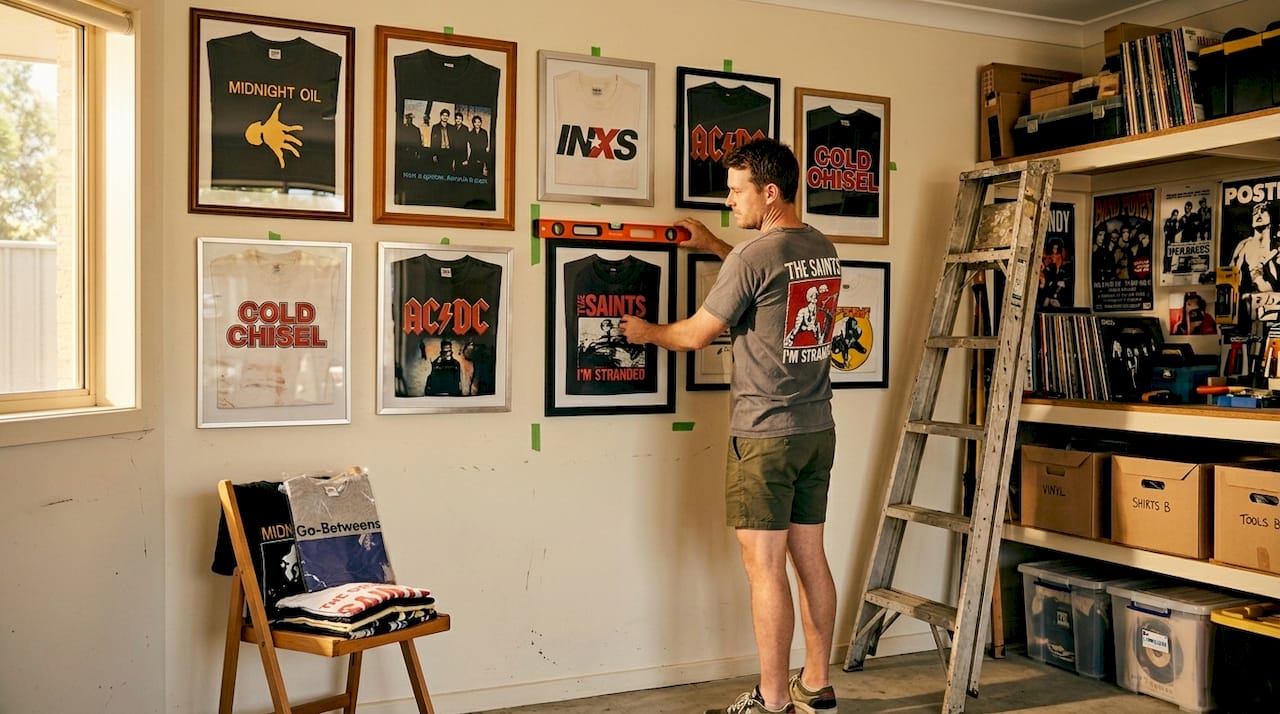
For arranging multiple shirts, grid layouts give a clean, gallery-like result. Grouping by era, band, or tour creates a story on the wall that other collectors will immediately read and respond to.
Pro Tip: When displaying vintage shirts as a thematic wall arrangement, build the layout on the floor first and photograph it before committing to drilling holes.
Common mistakes that damage collector shirts
Even experienced collectors make these errors. Knowing them in advance is far cheaper than discovering them after the damage is done.
“The framing is a system — balancing light, microclimate, and materials in contact. Getting one element wrong undoes everything else.” — conservation principle from Winterthur Museum textile guidelines.
The most common mistakes include:
- Pinning through fabric. Pins and tacks create tear points at stress locations. Over time, the weight of the shirt causes fabric to rip from those points outward. Conservation mount systems with broad Velcro or sewn support strips are always preferable.
- Ignoring light dosage. Light damage is cumulative. It is not just about intensity but about total lux-hours over time. A shirt in a dim room for years accumulates the same damage as one in a bright room for months. Track both.
- Using non-archival adhesives. Sticky tapes, hot glue, and craft adhesives that touch fabric directly will brown, harden, and chemically damage fibres over years.
- Hanging on metal hooks without padding. Metal makes direct contact with fabric and can cause abrasion marks or chemical staining at contact points. Always pad or sleeve any metal component.
- Overcrowding without air circulation. Shirts packed too tightly trap moisture, which encourages mildew growth. This is especially risky in older homes with variable humidity.
- Never rotating. Leaving the same shirts permanently displayed is the single fastest way to degrade them. Even the best lighting setup delivers cumulative lux-hours that add up over years.
Creative display ideas that preserve and impress
The most striking shirt collections use display methods that also protect the shirts. These two goals are not in conflict when you know what you are doing.
Shadow boxes are the closest thing to museum-standard display you can achieve at home. A deep shadow box with UV-filtering glazing, acid-free backing, and a padded mount creates a sealed environment that protects the shirt on all sides while putting it on visual show. Shadow boxes suit prized, museum-style presentation while grid displays offer flexibility for a larger rotating collection.
Adding storytelling elements alongside the shirt deepens the display significantly. A small printed label with the band name, tour year, and a line about where the shirt came from turns a framed tee into a piece of genuine cultural history. You can also include a small printed photo from the tour, a ticket stub in a corner pocket, or a short typed note sealed behind the glass. Collectors who visit your space will stop and read every word.
Indirect LED lighting is the best lighting choice for shirt displays. Position LED strip lights above or below the display, angled so they wash the wall with light rather than hitting the fabric directly. Indirect, low light reduces damage and creates a far more atmospheric display than a direct spotlight ever could.
For smaller spaces, wall-mounted rails or dowel systems let you display shirts in a compact horizontal strip. Use wooden or coated metal rails with soft rubber or fabric collars where the shirt drapes over the rod. This works particularly well for organising a heavy metal shirt collection where visual access to multiple pieces matters.
Grouping shirts by theme, era, or colour palette is a simple technique that transforms a wall of shirts into a visual statement. A wall of 1980s thrash tour shirts grouped chronologically reads like a timeline of the genre. A colour-coordinated arrangement of black and white prints creates something that functions as graphic art. Both approaches work because they give the eye a pattern to follow.
What I have learned after years of displaying vintage shirts
I have seen collectors spend serious money acquiring rare shirts and then ruin them with a two-dollar nail and a thumbnail-sized contact point bearing all the weight. It still frustrates me.
The thing most collectors underestimate is the cumulative nature of light damage. You look at your shirts every day and they look fine. Then five years later you compare a displayed shirt to one that was stored in the dark and the difference is stark. Museum guidelines recommend maximum light levels around 50 lux for sensitive textiles. Most living rooms run at 200 to 500 lux without anyone noticing.
In my experience, the rotation habit is the hardest to build and the most valuable to maintain. I started treating display rotation like a seasonal task, the same way you would swap out clothes for summer and winter. Set a calendar reminder. Pull the shirt down, store it properly using correct vintage shirt storage, and put something fresh up. The shirts you are not displaying stay in better condition and the ones you put up feel new again.
The other lesson I keep coming back to is that framing materials matter more than most people realise. I have seen shirts correctly framed behind UV glass that still deteriorated because the backing board was cheap cardboard off-gassing acids onto the fabric. The whole system has to be right.
If you are serious about your collection, treat each display decision the way a conservator would. The shirts you own are not replaceable.
— David
Get the shirts worth displaying

If you are going to invest in proper display methods, it makes sense to start with shirts that are genuinely worth the effort. Com sources ex-tour stock, dead stock, and second-hand heavy metal shirts that most collectors will never find in a single place. From a rare Metallica 1992 tour tee that belongs behind UV glass to collectible Australian metal band shirts that deserve a proper shadow box treatment, the range covers the shirts serious collectors actually want to own and display. Browse the full vintage Metallica shirts collection and find your next piece.
FAQ
What is the safest way to mount a collector shirt?
Use Velcro hanging strips sewn or attached along the top edge of the shirt to distribute weight evenly. Avoid pinning through the fabric, which creates tear points at stress locations.
How much light is safe for displaying vintage shirts?
Museums recommend maximum light levels around 50 lux for sensitive textiles. Use a lux metre to check your display area and switch to indirect LED lighting to stay within safe limits.
How often should I rotate shirts in my display?
Rotate displayed shirts every 3 to 6 months to manage cumulative light exposure. Tracking total lux-hours rather than just calendar time gives you a more accurate guide for when to swap shirts out.
Do I need UV glass for framing collector shirts?
Yes. UV-protective glazing and acid-free materials are considered essential conservation practice for framing textiles. Standard glass blocks very little UV and allows significant light-related fabric damage over time.
Can I display shirts on open hangers without framing?
You can, but padded hangers on wall-mounted rails offer far less protection than sealed framing. Use this method for shirts you rotate regularly and store the rest away from light and humidity using proper textile storage practices.
Recommended
- How to organise your heavy metal shirt collection: 4 steps – Vintage Metal Store
- Why fans collect old shirts: Cultural power of vintage metal tees – Vintage Metal Store
- Spot genuine dead stock shirts: A collector’s guide – Vintage Metal Store
- Sample band t-shirts: Rare finds and collector value – Vintage Metal Store


